Gathering information from online sources is a difficult task especially if you’re doing it manually. But with automation, you’ll be able to get all sorts of data that you might need whether it be for business research or personal use.
Fotor NFT Creator — Easily Create Amazing NFT Artworks in Minutes with the Fotor-NFT Creator.
Today, we’ll tell you everything you need to learn about web scraping and Node.js so you too can automatically extract data from all over the web.
What Is a Web Scraper?
First, let’s talk about web scrapers. What is web scraping? And how can a web scraper help you gather data?
Web scraping is the process of gathering data from online sources — so long as the data is publicly available. This data can then be used by marketers, business owners, or researchers.
To get data, you’ll need a web scraper. A web scraper is a script that you run to crawl and collect publicly available information.
There are many types of scripts that you can use. But today, we’re using Node.js as our script’s foundation.
What Is Node.js?
Node.js is a free open-source server environment that uses JavaScript on the server. It can run on different platforms such as Windows, Linux, and Mac OS.
Some of its advantages include being very fast (as it uses Google Chrome’s V8 JavaScript engine), asynchronous, and event-driven. There’s also no buffering and it’s highly scalable.
How to Use Node.js to Create a Web Scraper
Before we begin, you’ll need to download and install Node.js. Those with some JavaScript knowledge will have an easier time following along.
You will also need access to a code editor like WebStorm or Visual Studio Code.
Step 1: Start a Project
Using your code editor of choice, start a new project by creating an empty directory. You can name the project anything you want.
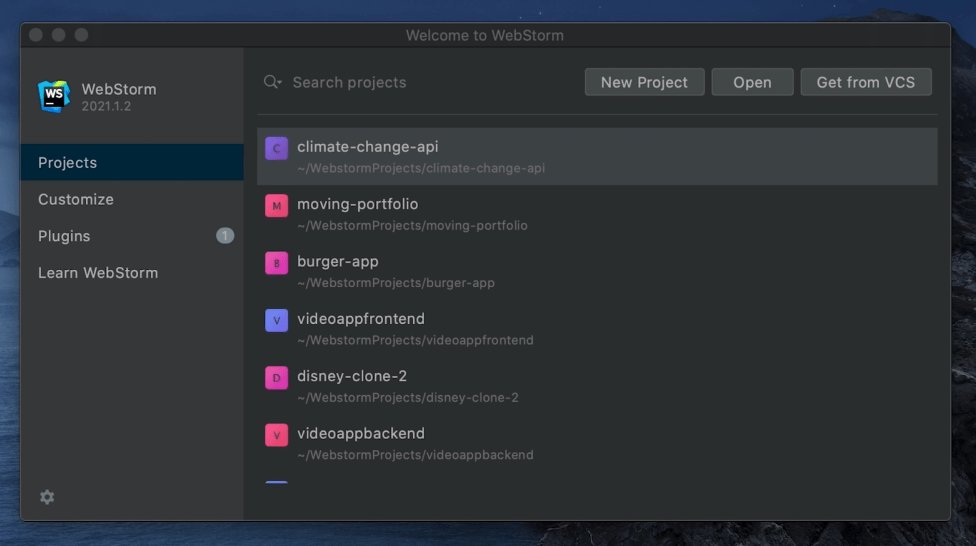
This will allow you to create a completely new project from scratch.
Step 2: Create a JSON Package
Open the terminal and type the command npm init — the main purpose of this command is to allow us to install packages or modules into the project.
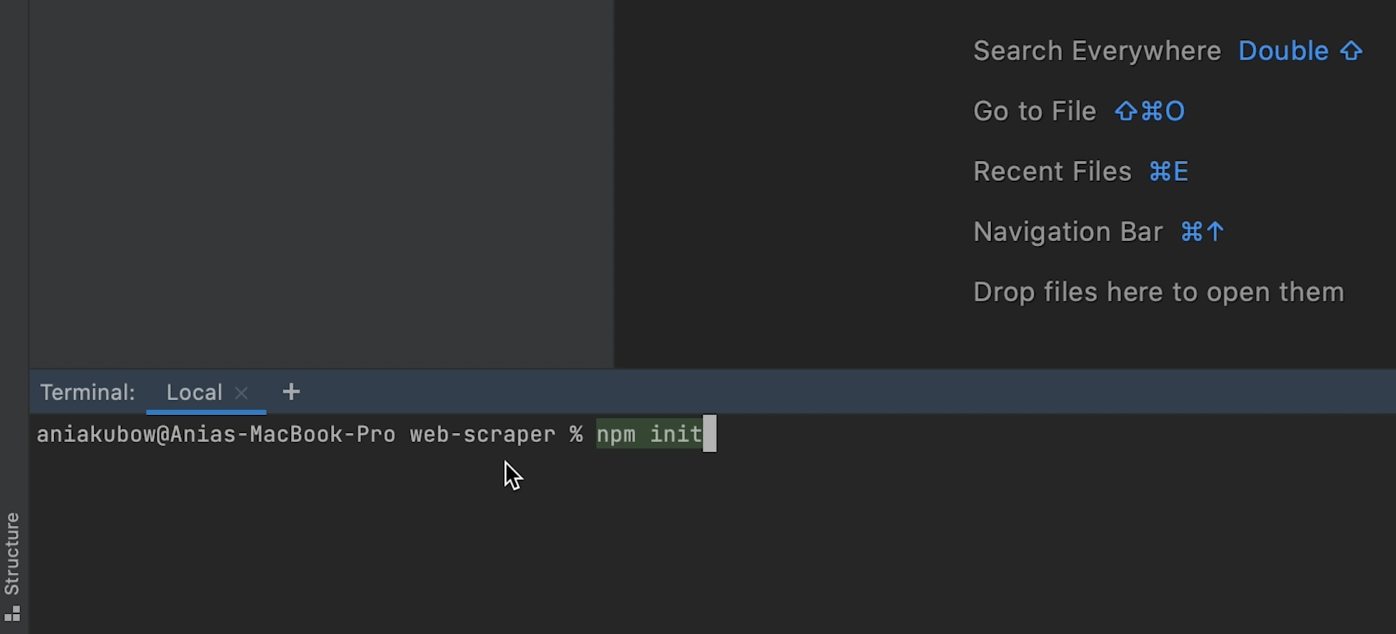
A package or module (in this context) refers to publicly available code that adds functionality to an application.
While this could be an oversimplification, you can think of packages like WordPress plugins that add more features to a WordPress site.
You can find a list of packages on the NPM Inc. website.
After typing npm init, press enter. This will enable you to create a package JSON file — a requirement for using Node.js.
You’ll be presented with fields that you can fill up to describe the package you’re creating (such as the package name, version, description, etc.). You can leave these blank by hitting enter a few times until you’re asked to confirm if this is okay.
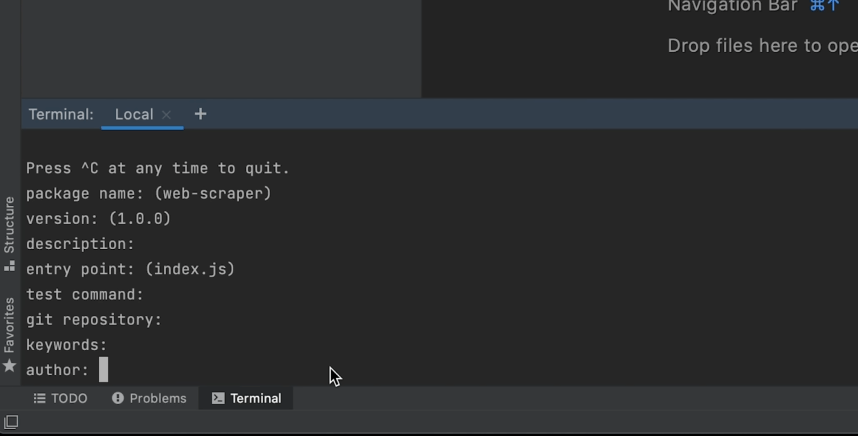
Confirm that everything is okay to continue.
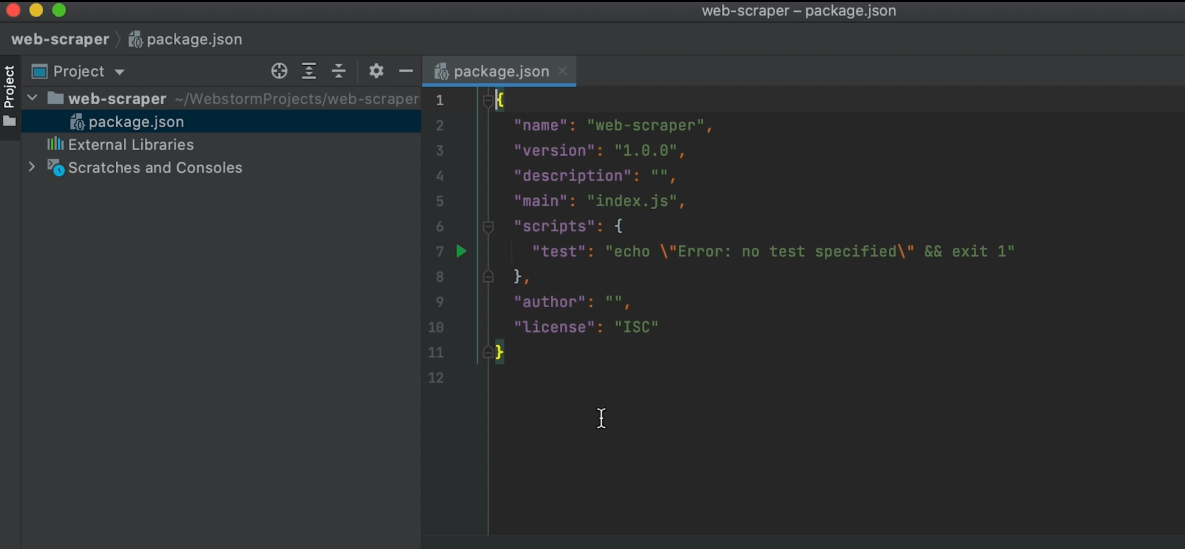
Check your project to see if your JSON package was successfully created.
Step 3: Create an Index.js file
The main file that we’re going to be reading is index.js. You can confirm this in the script you’ve just generated.
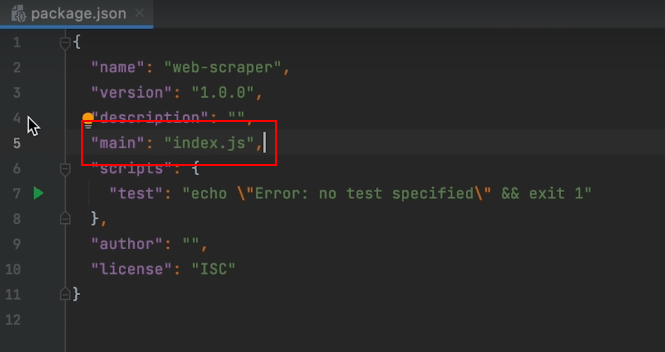
That means we’ll have to create an index.js file. To do that, right-click your package.json file and navigate to New > File.
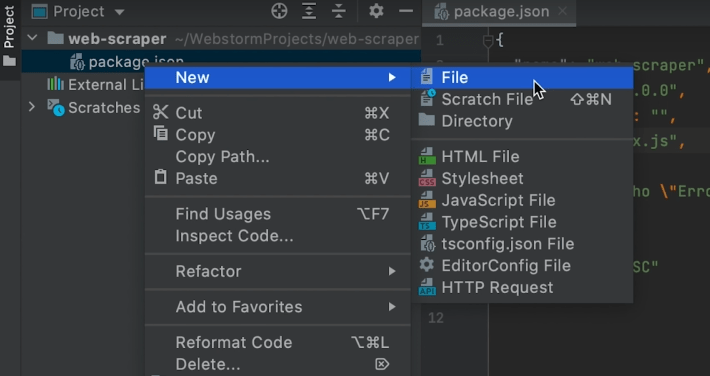
Name the new file index.js
Step 4: Install Packages
For this project, you will need to install some packages starting with one called Express. This package is a backend framework for Node.js
Type in the command npm i express then hit enter.

Wait for Express to install. It should only take a couple of seconds. After installation, you should now see Express as a dependency for the project.
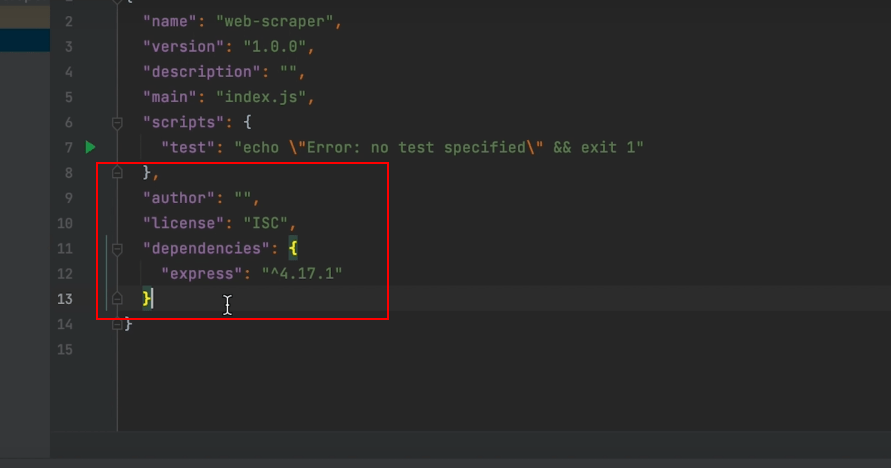
Now that Express had been installed, we can move on to the next package that we need to install. This one is called Cheerio. This will be used to pick out HTML elements on a web page.
The command to install Cheerio is npm i cheerio. Follow the same steps you used to install Express.
The last package we’ll need is Axios — a promise-based HTTP client for the browser and Node.js
The command to install Axios is npm i axios. Follow the same steps as above to install.
Step 5: Write a Script
With all the packages installed, you’ll need to write a Start script.
Under Scripts, enter this command:
“start”: “nodemon index.js”
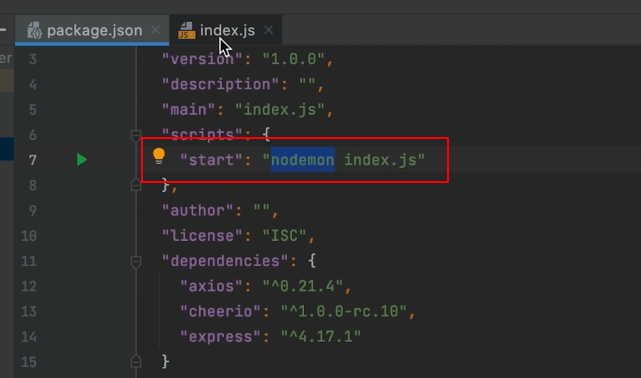
This command looks at any changes made to the index.js file.
Step 6: Modify the Index.js File
To use all the packages you just installed, you’ll need to “require” them in the index.js file. Enter the following commands in the index.js file.
Const axios = require(‘axios’)
Const cheerio = require(‘cheerio’)
Const express = require(‘express’)
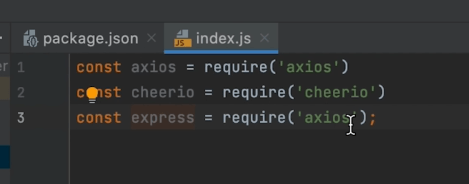
After that, you’ll need to “initialize” Express.
To do this, you’ll first need to “call” Express. Here’s the command:
Const PORT = 8000
Const axios = require(‘axios’)
Const cheerio = require(‘cheerio’)
Const express = require(‘express’)
Const app = express(
App.listen(PORT, () => console.log(‘server running on PORT ${PORT}’) )

Note: The values for app and port can be anything you want.
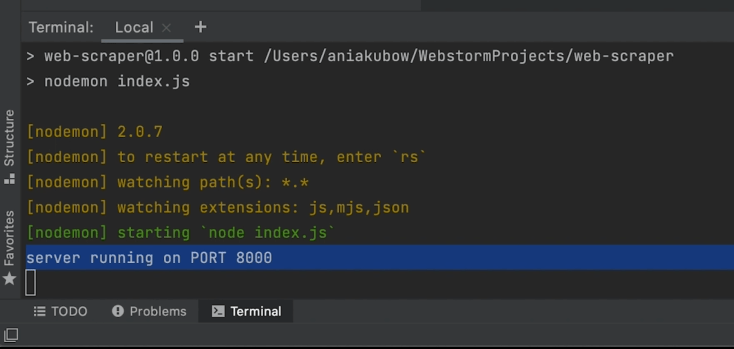
To check your progress, you’ll need to run the app. Since we used the command Start earlier, the command you’ll need to use is npm run start

If you’ve been following along and used the same values as in the example, you should receive a result that says “Server running on PORT 8000”
Step 7: Start Scraping
Now we can begin scraping data. To do that, we’ll need to make use of the packages we installed.
In the index.js file, insert these commands:
Const url = ‘https://www.example.com’
Axios(url)
.then(response => {
Const html = response.data
Console.log(html)
})
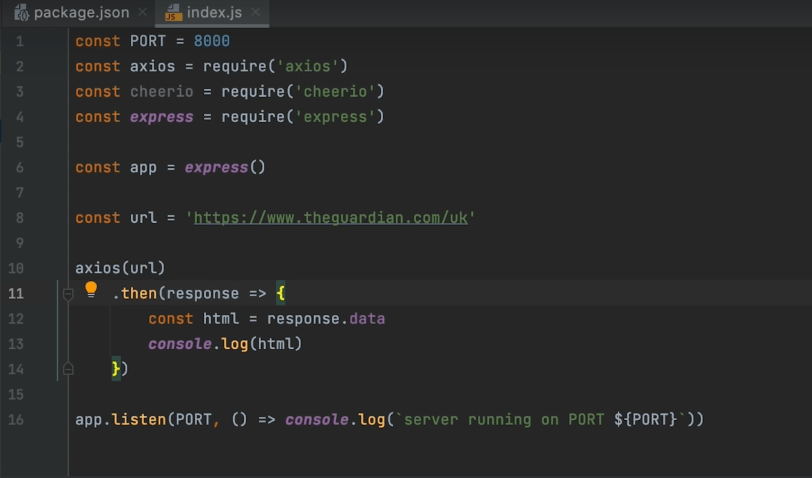
Note: The value “https://www.example.com” should be replaced with the site you’re trying to extract data from.
This will extract data from the entire webpage that you entered. If you want to extract specific data, you’ll have to use the Cheerio package.
Let’s use an example.
If you want to grab the title of each article on The Guardian’s website (along with their URLs), you can use this syntax:
Const url = ‘https://www.theguardian.com/uk’
axios(url)
.then(response => {
Const html = response.data
Const $ = cheerio.load(html)
Const articles = []
$(‘.fc-item__title’, html).each(function() {
Const title = $(this).text()
Const url = $(this).find(‘a’).attr(‘href)
Articles.push({
Title,
URL
{)
console.log(articles)
}).catch(err => console.log(err))
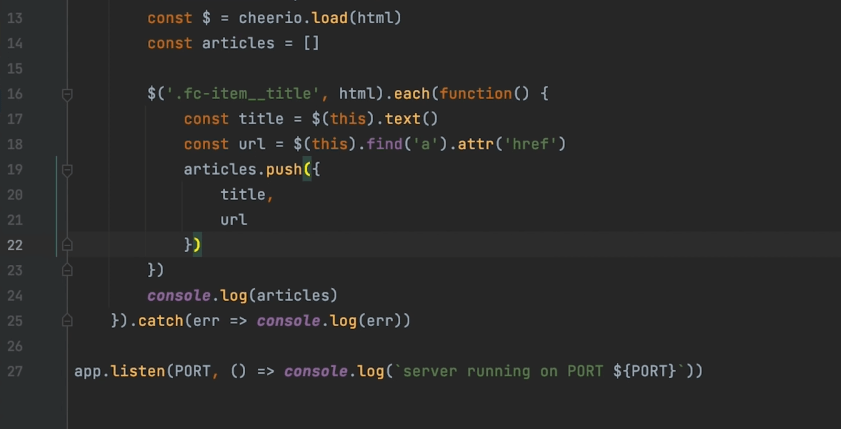
You’ll have to use the Inspect Element feature of your browser to see which values you need to enter to specify which data you can extract from the page.
Conclusion
You can now modify the code to do whatever you need. With some tweaking and practice, you’ll be able to extract a ton of data from online sources.
Screenshots used are from Code With Ania Kubow
Related posts:
Designing With Data: How to Improve UX Using Customer Data
How To Collect and Transform Data Into Your Business Value
The post How to Build a Web Scraper Using Node.js


